
How to disassemble a Moen kitchen faucet? Disassembling a Moen kitchen faucet is easy. You will first need to turn off the water first, then remove the cap from the top.
Again, place the chrome sleeve snaps and unscrew the black metal plastic. Then remove the small metal washer and you are all set to install a new cartridge.
Well, these above key points were just a glimpse of the steps for disassembling the Moen kitchen faucet. Unless you go through the steps, in brief, your confusion is not going to get cleared.
In this article, we will go through the tips and techniques that you will need to know to disassemble a Moen faucet’s cartridge.
So, let us not make any further delay and get to the topic straight. Keep reading!
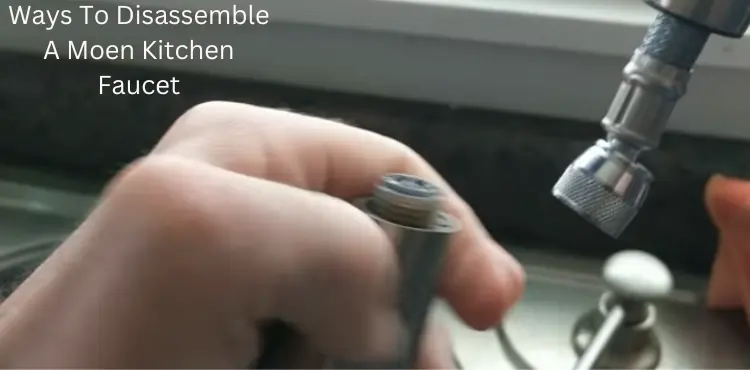
How To Disassemble A Moen Kitchen Faucet? (10 Ways)

Here are some disassembling steps below for a Moen kitchen faucet. Have a look:
Shut off The Water:
To disassemble a Moen kitchen faucet, you have to start by shutting off the water. Just rotate the shutoff valve clockwise until it gets closed properly.
Remove The Water Indicators:
Now it’s time to remove the water indicators by holding the hands directly over the wave sensors. Try holding your hands for about 5 seconds.
Thus, the water will turn off after running for some time. Afterward, use a little pick to pry it out and plug the drain. As a result, all parts will remain stable.
Loosen Up The Hex Grub Screws:
In the next step, you will have to loosen up the hex grub screws. An Allen wrench would be the best alternative for it. Or you can also go for a flathead screwdriver. Use any of these substitutes to turn the screw clockwise.
It depends on what type of screw you have. Again, you have to turn the screw counterclockwise as well to remove it completely.
Remove The Handle:
Removing the handle in a Moen faucet is easy. You just need to loosen up the screws from the back of the handle. A 3/32″ hex wrench would be handy for it.
Take The Phillips Screw Out:
To take the Phillips screw out, you have to use a Phillips screwdriver for it. This is the screw that is placed in the center of the stem. Besides, it holds a metal bracket.
Remove The Chrome Outer Base:
Use an adjustable wrench to unscrew the chrome outer base by turning it counterclockwise.
Once the base becomes loose, you can perform the removal task simply with your hand. Since the Moen faucet is user-friendly, you can use your hands to remove its chrome outer base.
Pull Out The Clip of The Stem Cartridge:
To pull out the clip of the stem cartridge, use a flathead screwdriver or a wrench to insert it at the bottom. Remember, the placement should be between the cartridge and the clip since the clip is located on the cartridge.
You can use a plier for it. The clip should be pried enough so that you can get good access. The clip is located on the cartridge, so pull the slip straight out from there.
Unscrew The Sprout Collar:
The sprout collar also needs to be removed by unscrewing the sprout collar nut. Use the hex wrench and turn the nut counterclockwise. Then lift the nut and rotate the sprout. Now your faucet is all set for reassembling.
Inspect For Damages:
Don’t forget to inspect the interior parts of the cartridge so that you can take immediate steps if damage occurs. Besides, if you see any debris mineral deposits, clean them up.
Place The Taps:
Now it’s time to place the hot and cold water taps on their cartridges. Also, make the handle lined up so that you can tighten up the base properly. However, mounting the cartridge is different for a wrist-style handle and a cross-style handle.
For a wrist-style handle, place the cartridge exactly into its position since it sits in a parallel way. For a cross-style handle, place the front edge in a square shape.
Frequently Asked Questions
How To Repair A Moen Kitchen Faucet?
To repair your Moen kitchen faucet, you have to hook up to the faucet underneath the sink and then slide the hose. Then hook up the hose and turn off both the hot and cold sides. Afterward, check everything for leaks and hit the button for spray.
How To Repair A Leaking Moen Kitchen Faucet?
First, you have to remove the hot and cold indicators and disassemble the valve lever. Now open the repair kit and remove the cartridge. Next, replace the cartridge and install a new washer. Lastly, replace the faucet handle. And you are done.
How To Replace The Moen Faucet Handle?
First thing first, you will have to open the faucet handle and test it. Next, place the handle and test it by turning it on. You can use Allen keys to align the screws with the handle. Lastly, put the cap in its place just to identify the hot and cold sides.
How To Fix Moen Kitchen Faucets?
Get ready with a cartridge puller tool. Then turn off the water at the water main by taking off the retainer clip. Afterward, remove the cartridge and check for a warranty. Then tighten up the retaining nut and test the nut. This is how you can easily handle the assembly work.
How To Install A Pull-Out Kitchen Faucet?
To install a pull-out kitchen faucet, you will have to mount the faucet assembly on your sink first. Then install the mount bracket. Afterward, install the mounting nut and tighten it up.
Also, install the pull-out hose and hose weight. Then connect the pullout hose and attach the spray wand. Lastly, clean up your faucet.
Final Thoughts
Hopefully, the above concept could give you an oriented distinction about the disassembling process for a Moen kitchen faucet. However, following the key steps can make your task easier.
You will need to start by turning off the shutoff valve first so that the water does not bother you while working. Then, you will need to remove some parts. Such as chrome caps, chrome sleeves, black plastic metal sleeves, small metal washers, etc.
After removing all the parts properly, you can make your sink ready to install a new faucet. Just follow the above steps and you can easily get your job done. And yes, don’t forget to check for leaks and dirt.
If you find any dirt or debris, clean them up. And if you still find any leaks, it’s better to call a plumber. This is all. Let us know through the comment section below if you have any queries.
Thank you.

Hi, this is Sondip. In my opinion, the best approach to making the most of your home is to clean it, decorate it, and organize it. You should feel most at ease in your own home.
If you considering changing your faucets or wanting to repair the ones you already have could find my enthusiasm and my ideas to be of enormous help. My aim is to assist you in selecting the ideal faucet, and accessories for your residence and ensure that they are compatible with your sink and worktops.